CONFIGURE OPENBOX
configure three most important configuration files of Openbox: menu.xml, rc.xml and autostart.
OVERVIEW:
What we will do to have a Openbox Windows manager:
- Step 1: Install the core packages.
- Step 2: Configure Openbox
1. Install the core packages:
Here is the command to install them:
sudo apt-get install xorg openbox suckless-tools terminator lxpanel thunar lightdm wicd firefox geany
From previous chapter, you have known what are these core packages and what they will contribute to your system.
After they have been installed, you will have a bare frame of a operating system with Xorg as the prerequisite of GUI and video driver, Lightdm as the login manager, Openbox as the windows manager, Thunar as the file manager, Lxpanel as taskbar, Wicd as the network manager, Terminator as the the terminal emulator, Geany as the text editor, Firefox as the web browser.
From this frame, we will develop them into a fully functional OS.
2. Configure Openbox:
After Step 1, reboot your system and login for the first time. If a grayish screen are there greeting you (with mouse point). Your Openbox system is ready for further configuration.

There are somethings that I should tell you about our upcoming system. If you come from a Windows world, you might expect that you can click a shortcut (icon) on your desktop to call an application. There will be no such thing in our system. The job of creating icon on your desktop is called “managing desktop” and it is the service of a File Manager.
In my opinion, the feature is redundant and unnecessary with Openbox. With its right clicking menu and shortcut keys, you will feel the superior of these methods is far over finding an icon on your desktop to click.
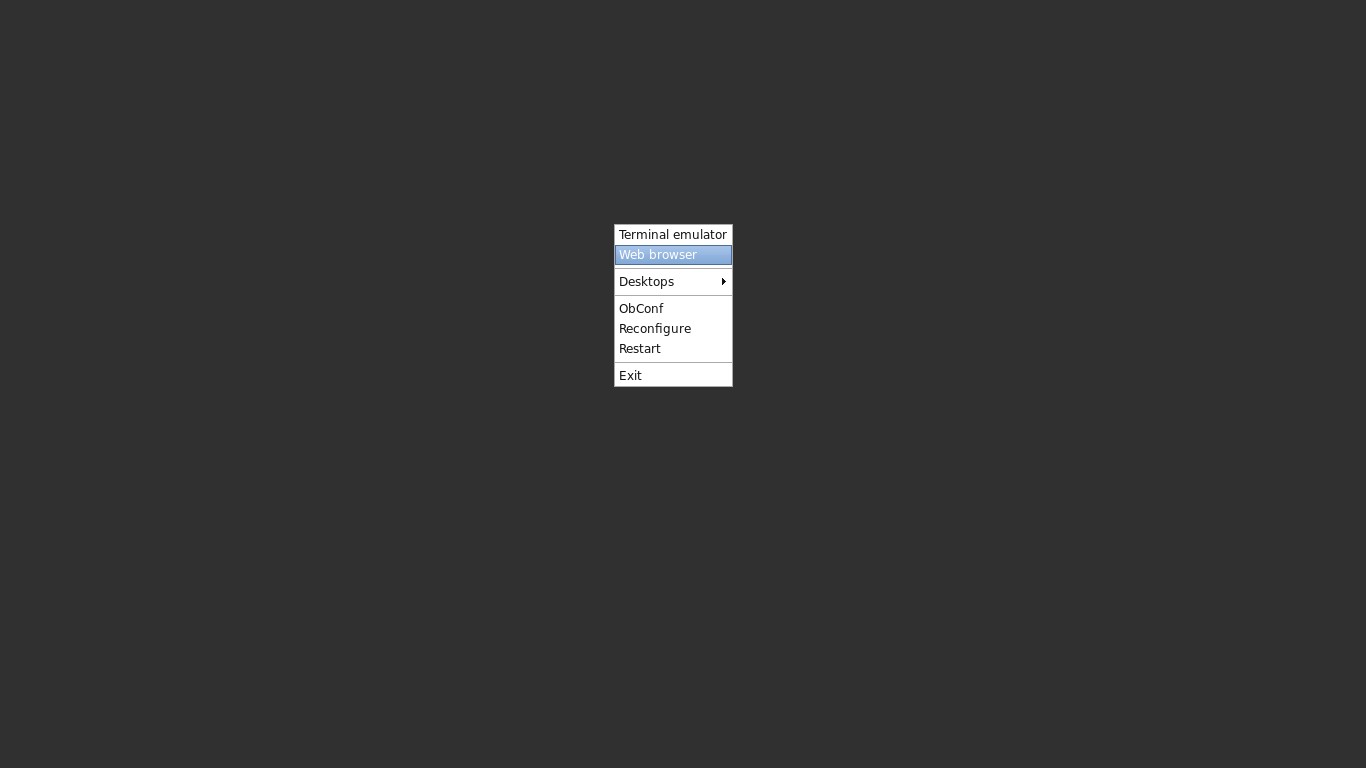
- Right-click menu: By right clicking your mouse, there is a menu of applications. Click to any app to call it. But at the moment, you only can call Terminator (the terminal entry) or Firefox browser (the Web browser entry).
- Shortcut keys: Pressing the Windows key (the key that have “Microsoft Icon” on it) and the key T: Windows + T, the Terminator terminal should be started. The shortcut key will improve your productivity after you have familiar with it. Openbox let you choose shortcut keys freely. In later part of this chapter I will show you how to create your own shortcut keys.
At the moment, your system will look a bit ugly comparing to modern standard. You will learn how to make your Openbox system looks decent in some later chapters. In Linux world, some of us really do not care much about the look. I have seen some minimalists using only tiling window manager with just wallpaper on the screen (They even go as far as not using any mouse at all).
At the moment our Ubuntu Openbox has no taskbar, no wallpaper, no volume control, no terminal emulation, no file manager, no power manager, no network manager… A fully functional operation system will also not worry its user about some basic automating tasks such as: shutdown/restart, system monitor, etc. Our system is lacking all of that! 😀
From now on we will add more features to our Openbox:
2.1. Open this guide on Firefox browser:
The reason for telling you to install Firefox at the very beginning is for you to read this guide while installing your system (and also saving you some time by copying/ pasting commands directly from my website). Right-click, then choose “Web Browser” to start Firefox browser, go to UbuntuOpenbox.com/lessons/lessons.html.
2.2. Creating the seed configuration files:
The configuration of Openbox is defined within three files: rc.xml, menu.xml, autostart.
At default, after you have installed Openbox, there are no configuration files for normal user, and your Openbox is using the global configuration files stored at /etc/xdg/openbox. We will use these file as the seed for our further configuration.
Type below command as normal to copy global files over home folder:
cp -R /etc/xdg/openbox ~/.config/
Now if we go to the directory ~/.config/openbox by:
cd ~/.config/openbox
and see what are in it by:
ls -lh
These are the seed files for our Openbox configuration.
showing ls output of the folder
2.3. Configure Openbox:
We will configure the above seed files one by one:
menu.xml:
We have some programs for auto generating right click menu, but I always find the auto generated menu too messy. I like to manually manage it.
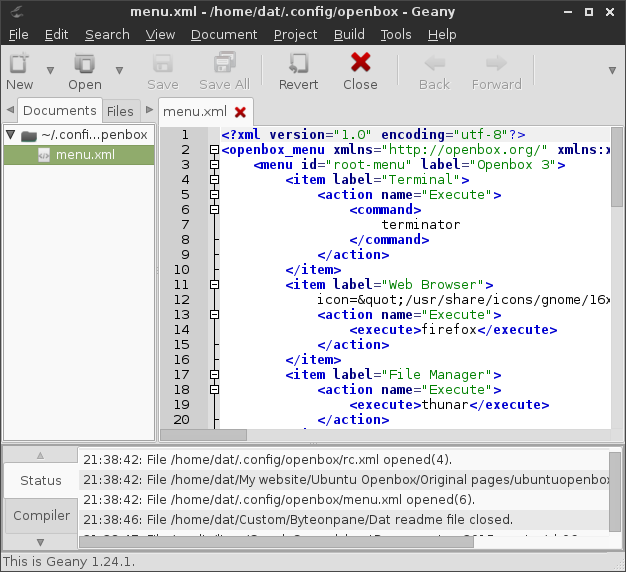
We will use my current configuration here: https://pastebin.com/5Cixsqpa. Then replace the current content of menu.xml with mine:
geany ~/.config/openbox/menu.xml
then Save

autostart
Any programs or commands in Openbox need to be instructed specifically if you want them to auto-run at the startup. You can also set timing to start those programs chronologically. Fortunately, the job is fairly easy. All you need to do is put a line of command in the autostart file.
For instance, the command to start lxpanel:
(sleep 3s && lxpanel) &
The command mean: delay 3 second before starting lxpanel.
We are also using mine autostart file. Here is its link: https://pastebin.com/EmY8gx9c.
geany ~/.config/openbox/autostart
rc.xml
This file helds the configuration for all the shotrcut-keys and define how an application will appear on the screen. How to modifying the file is really easy. Below is the typical entry:
<keybind key="W-t">
  <action name="Execute">
    <startupnotify>
      <enabled>true</enabled>
      <name>Terminal</name>
    </startupnotify>
    <command>terminator</command>
  </action>
</keybind>
Just change the combination keys “W-t” and the command “terminator” respectively and you will have a new shortcut-key.
Somethings you need to be noted:
- The capital W: the Windows key which have this icon:

- The capital A: the Alt key
- The capital S: the Shift key
- The capital C: the Control key
Go to my rc.xml file here: https://pastebin.com/ajfTFaay. Copy the content and replace the current content of rc.xml file. Mind you, the content is really long!
To open the rc.xml file with Geany:
geany ~/.config/openbox/rc.xml
Restart your computer for all the change to take effect.
3. Using Obmenu to edit menu:
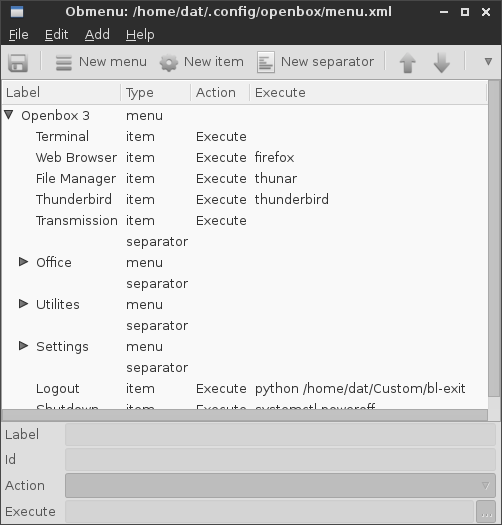
Although edit the menu.xml text file directly is easy, you can also use a program called Obmenu to edit the file using GUI.
To install:
sudo apt-get install obmenu
To call it:
obmenu
